
Canning beans the old-fashioned way can be a rewarding and sustainable way to preserve your harvest without the need for a pressure canner. If you’re new to canning or simply prefer a more traditional approach, this article will guide you through the process of canning beans using a water bath canner. With this method, you can enjoy delicious canned beans that are perfect for soups, stews, and more.
What You’ll Need
Before you start canning beans, gather the necessary equipment and ingredients:
- Fresh green beans
- Quart-sized canning jars with lids and bands
- Water bath canner (not a pressure canner)
- Jar lifter
- Canning funnel (optional but helpful)
- Clean dish towels
- Spring water
- Boiling water
- Timer or clock
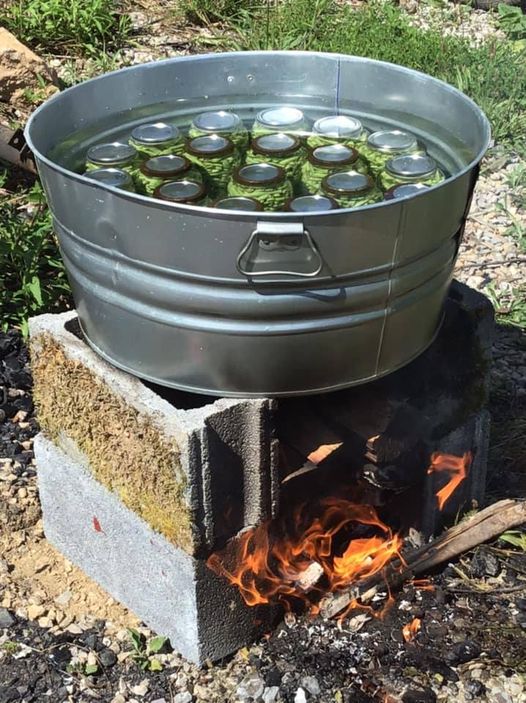
- A washtub or a large stovetop canner
Step-by-Step Instructions
Follow these simple steps to can beans the old-fashioned way:
- Prepare Your Beans: Start by washing and trimming the ends of your fresh green beans. Cut them into the desired length, usually around 1 to 2 inches.
- Sterilize Jars and Lids: Wash your canning jars, lids, and bands in hot, soapy water. Rinse them thoroughly. Place the jars in your water bath canner, and cover them with water. Bring the water to a simmer, and let the jars simmer for at least 10 minutes to sterilize them. Simmer the lids separately to soften the sealing compound.
- Pack the Jars: Using a canning funnel or a steady hand, pack the prepared green beans into the sterilized jars, leaving about 1 inch of headspace at the top.
- Add Spring Water: Fill each jar with spring water, ensuring that the green beans are completely covered. Leave that same 1-inch headspace.
- Seal the Jars: Wipe the rims of the jars with a clean, damp cloth to remove any residue. Place a sterilized lid on each jar, followed by a band. Tighten the bands until they are fingertip-tight—do not over-tighten.
- Prepare the Canner: In your washtub or a large stovetop canner, place a rack or a folded towel on the bottom to prevent jars from touching the direct heat source. Put the filled jars into the canner.
- Add Boiling Water: Fill the canner with boiling water, ensuring that it covers the jars by at least 1 inch. Keep the water level consistent throughout the process.
- Bring to a Boil: Place the canner on your stove and turn the heat to high. Allow the water to come to a rolling boil.
- Set the Timer: Once the water is boiling, set a timer for 4 hours. Make sure to maintain a steady boil throughout this time.
- Cool Down and Check Seals: After the 4-hour processing time, turn off the heat and let the canner cool down. Once the water is cool enough to handle, use a jar lifter to carefully remove the jars. As the jars cool down further on a clean towel, you’ll hear the satisfying “pop” of the lids sealing. This can take anywhere from a few minutes to several hours.
- Test the Seals: To ensure that the jars have sealed correctly, press down on the center of each lid. If it doesn’t move, the jar is sealed. If it depresses and pops back, the jar did not seal properly, and you should refrigerate or use its contents promptly.
Conclusion
Canning beans the old-fashioned way is a great option if you don’t have access to a pressure canner or simply prefer a more traditional approach to food preservation. By following these steps, you can safely and successfully can green beans using a water bath canner. Enjoy the fruits of your labor by incorporating these delicious canned beans into your favorite recipes throughout the year. Happy canning!