
Fig trees (Ficus carica) are not only known for their delicious fruit but also for their lush, tropical appearance that can enhance any garden or landscape. If you’re a gardening enthusiast, growing a fig tree from a cutting can be a rewarding and educational experience. It’s a cost-effective way to propagate a new tree, and with a little patience and care, you can watch your cutting flourish into a beautiful fig tree. This article provides a step-by-step guide for beginners on how to grow a fig tree from a cutting.
Step 1: Gather Supplies
Before you begin the propagation process, make sure you have all the necessary supplies ready:
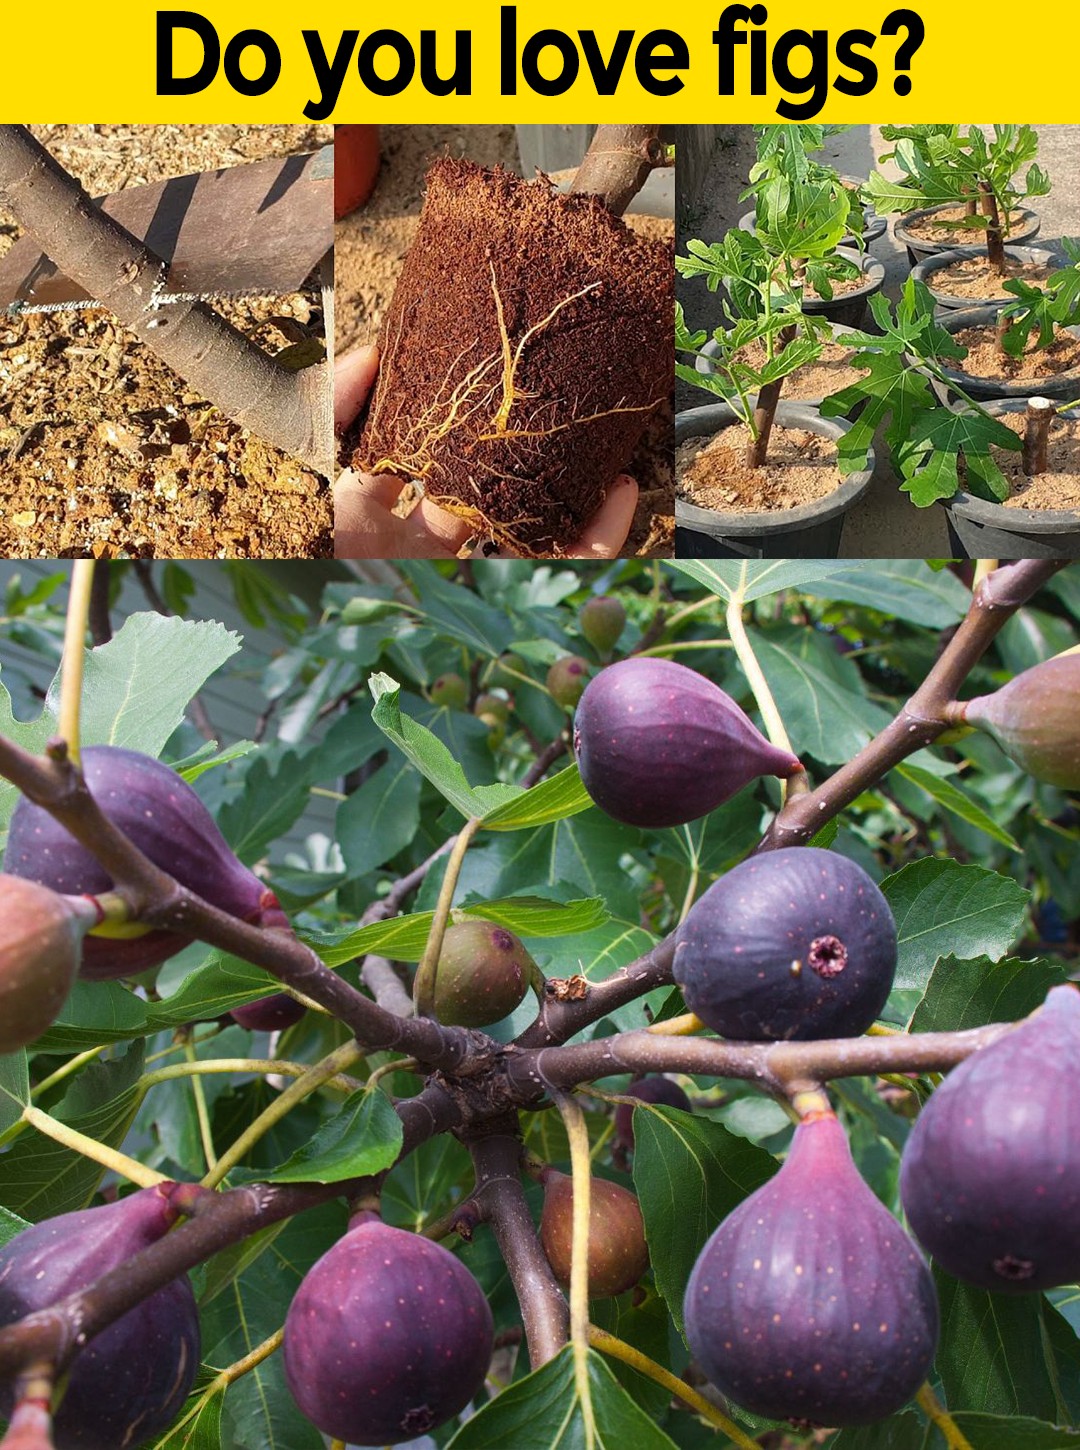
- Healthy Cutting: Choose a healthy, disease-free branch from an established fig tree. The cutting should be about 6-10 inches long and have several leaf nodes (areas where leaves emerge). Select a cutting from the current season’s growth for the best results.
- Pruning Shears: Clean and sharp pruning shears will help you make clean cuts, which are essential for successful propagation.
- Rooting Hormone: This is an optional but beneficial step. Rooting hormone can increase the chances of successful rooting by encouraging the development of roots.
- Potting Mix: Prepare a well-draining potting mix using a combination of peat moss, perlite, and vermiculite.
- Pots: Choose small pots with drainage holes that are suitable for starting cuttings.
- Misting Bottle: A misting bottle filled with water will help keep the cutting hydrated during the initial stages.
Step 2: Taking and Preparing the Cutting
- Select a Suitable Cutting: Choose a branch that is about the thickness of a pencil. It’s best to take the cutting in early spring when the tree is actively growing.
- Make the Cut: Use clean and sharp pruning shears to make a clean, diagonal cut just below a leaf node. This node is where the roots will eventually emerge.
- Apply Rooting Hormone: If you’re using rooting hormone, dip the cut end of the cutting into the hormone powder, tapping off any excess.
Step 3: Planting the Cutting
- Prepare the Potting Mix: Fill a small pot with the prepared potting mix. Water the mix lightly to ensure it’s moist but not soggy.
- Plant the Cutting: Insert the cut end of the fig cutting into the potting mix, burying it about an inch deep. Gently press the soil around the cutting to ensure it’s stable.
Step 4: Care and Maintenance
- Provide Humidity: Fig cuttings require high humidity to encourage successful rooting. Place a clear plastic bag or a plastic dome over the cutting to create a mini greenhouse environment.
- Indirect Light: Place the pot in a location that receives bright, indirect light. Avoid direct sunlight, as it can scorch the cutting.
- Regular Misting: Mist the cutting and the inside of the plastic cover with water to maintain a humid environment. Check the moisture level of the potting mix and mist as needed to prevent it from drying out.
- Monitor Growth: In a few weeks, you should start to see new growth on the cutting, which indicates that it’s developing roots. Once the cutting has established roots and has grown a few new leaves, you can gradually acclimate it to lower humidity levels by removing the plastic cover for short periods each day.
Step 5: Transplanting
- Wait for Root Development: Once the cutting has developed a healthy root system and is growing vigorously, it’s time to transplant it into a larger pot or directly into the ground, depending on your climate and location.
- Select a Permanent Location: Choose a sunny location with well-draining soil for your fig tree. Fig trees thrive in warm climates, but they can also be grown in containers in cooler regions and brought indoors during the winter.
Conclusion
Growing a fig tree from a cutting is a fascinating and rewarding process that allows beginners to experience the joys of propagation and nurturing plants. With attention to detail and proper care, you can watch your fig tree cutting transform into a thriving tree that provides you with delicious fruits and adds beauty to your outdoor space. Remember that gardening is a journey of learning and patience, so don’t be discouraged by any challenges that may arise along the way. Happy gardening!